Sunday, October 26, 2008

HDX 1000 Review #7 - Known Issues, Workaround, Conclusions

Introduction

This is the 7th part of our HDX 1000 review. This part will first go over two known issues and the work-around. We will then deliver our final conclusion of this HDX 1000 review series.
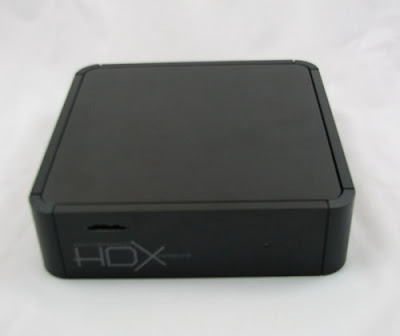
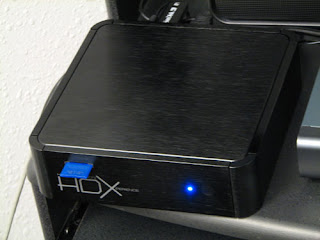
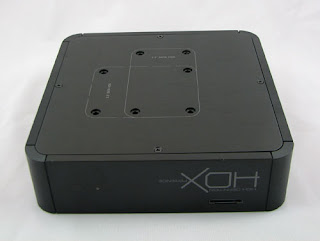
HDX 1000 Front View

You might be curious about why an important part of the review – content format compatibility test is missing. As stated in the first post of this blog: I’m still new in this HD digital entertainment industry. I have not collected my set of the content samples (in different codec / format). I’ll need to do this before I can start the compatibility test. Please send me the file through email if the file size is small. Otherwise, please send me a link to download the files. Your help will actually expertise my process to collect content samples so that I can come back to complete the review sooner.

Known Issue #1 – My Slave USB port on HDX 1000 does not Work

There is a USB slave port on the back of the HDX 1000. The design concept of having this port is to make your HDX 1000 work as an external portable HDD (if there is an internal HDD installed in the HDX 1000). Accompanied with the attempt to reduce the weight (see description here), users now can move the HDX 1000 around, connect it to the PC through the USB cable and transfer files between the two. If you are a person like me who is biased and thinks the file transferring via network is slower and unsecured, you can perform the transfer in this way.

This design looks wonderful on paper. However, when I first connect my HDX 1000 to my PC through the USB slave port, I can see the HDX 1000 trying to remove the internal HDD from the ‘Media Sources” menu (See the picture taken during the removing process at the end of this paragraph). But, my Vista notebook just cannot recognize the HDX 1000. After consulting with HD Digitech, they explained that when I first installed my internal HDD into HDX 1000, I formatted the HDD in EXT2 format. This is actually the default format the NMT application setup wizard will do, so more than likely you will have your HDD formatted in the same way. Furthermore, EXT2 is a Linux file system. This is why my Windows Vista notebook cannot recognize the HDD.
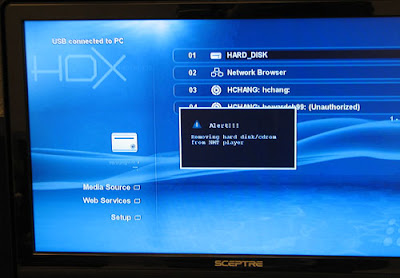
HDX 1000 Internal HDD removing

The application HD Digitech suggested for me to install on my notebook is Ext2Fsd. If you experience the same issue, you can go give Ext2Fsd a try, too. It did help me solve my problem. My notebook can now treat the internal HDD inside HDX 1000 as a removable HDD. The only caution to the Vista user is that Vista has a very restricted user account management system. You need to use your administrator account to sign in before you can use Ext2Fsd (or your Ext2Fsd will not find any HDD attached to your PC at all).

Known Issue #2 – My HDX 1000 Freezes

Depending on the content format you are trying to playback, you may experience a “freezing” up of your machine. You will need to reset the box to get back the control. I think it is an issue on Syabas NMT player software. All media streamers (Popcorn A-110, iStarHD Mini HDMI 1.3 NMT Player…) using the same solution should have the similar symptom. I’ll give you some examples below.

  • I tried to use the HDX 1000 to access the Bluray ROM on my computer. I was hoping this setup could be a cheap Bluray playback solution. The result was not good. It would freeze my HDX 1000.

  • I tried to rename a .dat VCD format file to .mpg and used my HDX 1000 to playback the renamed file. This action froze my HDX 1000.

  • I tried to use the HDX 1000 to playback a comic clip I downloaded from the Internet. It froze my HDX 1000.

As you can see in the list, the HDX 1000 tends not to be happy when you try to get it to perform some weird actions of which it is not designed to do. In addition, it is better to download the contents with high user completion number or contents from well known sources, to help you filter out bad formatted contents. There are a lot of contents which are coded improperly on Internet. If you feed your HDX 1000 one of these contents, you might need to hit that reset button very soon.

HDX 1000 Retail Box

Conclusion

I found the HDX 1000 is stable enough to perform the main task – playback contents stored in your PC on TV – what it was designed to achieve. The various storage options and services has broaden the experience and makes the operation easy. The HD playback capability is also a plus. Although I have stated several suggestions all along the review, I still found the benefit of having the HDX 1000 out-weighs the disadvantages. As long as you can operate the HDX 1000 in the way it is designed to, you can limit the chance of having issues. Besides, comparing to many other solutions from big name networking equipment companies, the price of owning a HDX 1000 is reasonable. If you are an early adopter like me and have the need to playback downloaded contents on TV, you should consider to give HDX 1000 a try.

Go to the HDX 1000 Product Page at AmperorDirect.com

Friday, October 24, 2008

HDX 1000 Review #6 - Comparison

Introduction

This is the 6th part of our HDX 1000 review. We are going to compare HDX 1000 with its previous generation: HDX 900 and one of its competitors, iStarHD HDMI 1.3 Mini NMT player.

HDX 1000 vs. HDX 900

Function-wise, the HDX 1000 works almost identical as the HDX 900. The major change on the HDX 1000 is the adoption of the HDMI 1.3 standard. (According to Wikipedia: the single-link bandwidth to 340MHz (10.2 Gbit/s) is the HDMI 1.3 version). It will supposedly enhance the performance of the HDX 1000. However, I have not learned a quantitative way to test the results yet. I can only say, judging from my eyes, the content playback is a little smoother on the HDX 1000. But, again, the “smoother performance” can be no more than a illusion generated by my brain after learning the difference between HDMI 1.1 and HDMI 1.3 on Wikipedia.

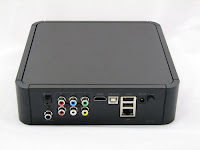
HDX 1000 vs. HDX 900 Back

The most significant change to the HDX 1000 is on its design and the output interface. A picture with HDX 1000 and HDX 900 placed side-by-side is present above. The right one is an HDX 1000.

  • You can see the size of the case has shrunk. The trim down of the metal used on the case has lowerered the weight of the machine itself from 3 lbs. to 2.2 lbs. This will help users to save on the shipping costs.

  • The sharp corner of the HDX 900 case has been redesigned to an oval shape. Compared to the HDX 900’s industrial equipment appearance, the HDX 1000 now looks more like a consumer electronics product of which you would have little objection to placing on your home entertainment rack.

  • The VGA display output on the HDX 900 has been removed and replaced by a coaxial and component output. Now you don’t need to have a HDTV to use the HDX 1000. It can work with an analog TV, too. I guess HD Digitech has listened to customers’ suggestions.

  • The SATA port (data only) presented on the HDX 900’s back panel has been removed on the HDX 1000. The SATA connector without the power portion can be a headache to users because they need to go find a power source to power the HDD they want to install on the HDX 900. The SATA port has been moved inside the case on the HDX 1000. It is a complete connector with data and power ports provided. It is also safer to have the HDD placed inside the case, thus reducing the chance of having the HDD electronics components exposed to users.

  • The power hard-switch on the HDX 1000 has been moved to the back panel. (I like it on the front panel better, for easy-access purposes.)

  • With the HDX 900, there is a chance of having the VGA connector head / SATA connector head / HDMI connector head interfere with each other. In other words, you might need to unplug one of the connectors in order to have another connector plugged in. This is not an issue any more in HDX 1000.

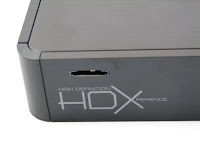
  • A card reader is installed on the front panel of the HDX 1000. Please see the below picture.


HDX 1000 vs HDX 900 Front

Overall, HD Digitech includes several design changes to the HDX 1000, which have been requested by real media streamer users. It indicates that they have a good attitude of listening to customers and trying to provide what they need. I certainly appreciate this attitude.

HDX 1000 vs. iStarHD HDMI 1.3 Mini NMT player

HDX 1000 and iStarHD HDMI 1.3 mini NMT player are based on the same media receiver solution: Sigma 3865 chipset + Syabas NMT player. Hence, they perform very similar functions. The differences are in the design, cooling and output ports selection.

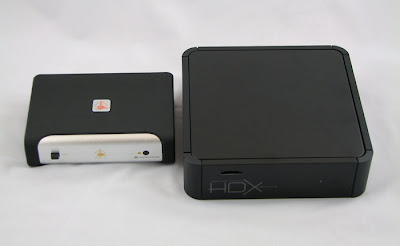
  • In the picture below you can see the box size comparison between the HDX 1000 and the iStarHD 1.3. The latter is almost half in size.


HDX 1000 vs. IstarHD 1.3 Front

  • The most significant difference between the two units is the case material. The HDX 1000 is made of aluminum and the iStarHD 1.3 is made of plastic. Thus, the iStarHD 1.3 is a lighter product.

  • On the other hand, the aluminum case material enables the HDX 1000 have a better heat transfer characteristic. That is why the iStarHD 1.3 needs to install a Fan inside the box, but the HDX 1000 does not. This allows the HDX 1000 to perform with less acoustic noise. In theory, the cooler operating temperature will help components to achieve a longer life. However, this needs to be verified with the HDX 1000.

  • There is a card reader on the HDX 1000, but not on the iStarHD 1.3.

  • The SATA HDD connector is located outside of the iStarHD 1.3 case. Therefore, the “internal HDD” needs to be installed outside of the iStarHD 1.3 box. With the HDX 1000, the “internal HDD” needs to be installed inside its box.


HDX 1000 vs. iStarHD 1.3 Back

  • HDX 1000 provides more options regarding output interface.

It is a classic trade-off situation. The iStarHD 1.3 offers a cheaper solution while the HDX 1000 provides more value (card reader, aluminum case, more output options…). You can make your own decision to see if the price difference for the HDX 1000 is really worth the money.

More…

At the time this review was written, I had not yet received my Popcornhour A-110. After I receive my machine, I’ll add a HDX 1000 vs. Popcornhour A-110 section to make this review more complete.

Read the 7th part of the HDX 1000 Review - Known Issues, Workaround and Conclusions

Go to the HDX 1000 Product Page at AmperorDirect.com

Thursday, October 23, 2008

HDX 1000 Review #5 - Services

Introduction

In this 5th part of our HDX 1000 review, we are going to go through the services it provides. The services can be categorized into two parts. The first part, “Web Services” are pre-installed in the HDX 1000. In other words, users can enjoy the benefit of using the out-of-box HDX 1000 to browse some pre-selected video / picture / news sharing websites. The second part of the services will be available when an internal SATA HDD is installed. It includes functions of file transferring and BitTorrent downloading.

Web Services

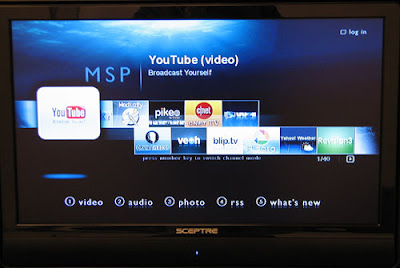
The “Web Services” are described in the introduction section. The browse-able websites are listed below in four categories. The link to each websites is also provided for preview purpose.

HDX 1000 Media Portal

1. Video (21) 2. Audio (8)
3. Photo (4)
4. RSS (7)

As of today, Oct 22, 2008, the total number of the browse-able websites via HDX 1000 web services is 40. Syabas is in the process of adding more channels to the list.

HDX 1000 Works as a NAS (Network Attached Storage)

You can setup your HDX-1000 (with the internal SATA HDD installed) as a NAS device and move contents in or out of the HDX 1000 from your PC. The way to do so is shown below:

1. Access the HDX 1000 by IP address.
  • Go to your HDX 1000.
  • From Root menu page, click on “Setup” at the left-hand-side navigation bar.
  • Click on “Network” on the left-hand-side navigation bar.
  • You can see the current ip address on the screen.
  • Go to your PC. Click on Start\Run in a XP machine and type “ \\(Your HDX 1000 IP address)“. (If you have a Vista machine, please go to Start and type “ \\(Your HDX 1000 IP address)“ at the Start Search Box.)
  • Enter the User name and Password, you can login to your HDX 1000 from your PC. (Default user name is “nmt”. Password is “1234”.)

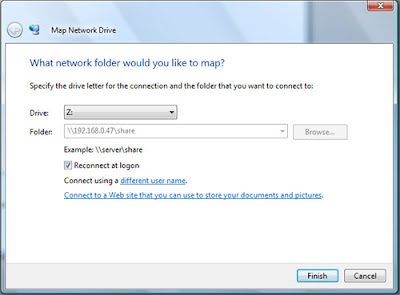
2. Map the HDX 1000 as your network drive.
  • Right click on the “share” folder. You can see one option as “Map Network Drive”. Left click on that.
  • Select the drive label you want to assign to the “share” folder, and click “Finish”.
  • The mapped drive should appear in “My Computer” for easy accessing.

HDX 1000 Map Network Drive


Access HDX 1000 via FTP Service

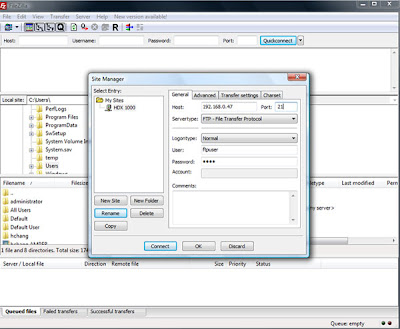
When installing the NMT application package on your HDX 1000 Internal SATA HDD (See the procedure here), by default you are adding a ftp server onto it. Later on, you can access HDX 1000’s internal HDD via FTP Service.

You first need to have a ftp client application installed on your PC. I recommend to use FileZilla (download from here). It will make the ftp tasks much easier.

Type the following server / login information into FileZilla site manager, hit connect, you should be able to access to your HDX 1000 now.
  • Host: “HDX 1000 IP address”
  • Port: 21
  • Username: ftpuser
  • Password: 1234


HDX 1000 FTP Server

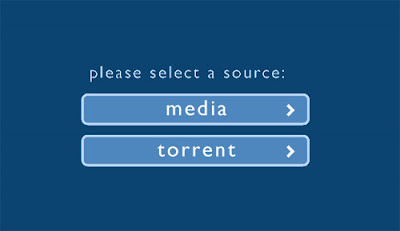
myiHomeLite Server

When installing the NMT application package on your HDX 1000 Internal SATA HDD (See the procedure here), by default you are adding the myiHomeLite server onto it. You can do two things with this service:

HDX 1000 myihomelite root menu

  • You can playback content stored in HDX 1000 on your PC. However, I cannot make this function work on my system. Since I usually need to stream the content in the opposite direction, from my PC to my HDX 1000, I don’t care if this function works or not.
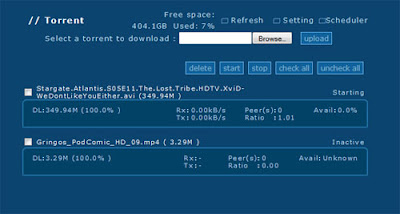
  • You can upload a torrent file onto HDX 1000 and let the HDX 1000’s built-in BitTorrent application download the file for you. The downloaded file will be stored in the HDX 1000 Internal HDD.


HDX 1000 Bittorrent Download Page

The way to access the myiHomeLite server is to open up your browser and type “http://(Your HDX 1000 IP address):8088 in the URL box. You should be able to see the myiHomeLite welcome page display. The rest of the operation is intuitional.

Conclusions

The services listed above have added convenience when using the HDX 1000. I’ve found the NAS service extra helpful in transferring files in to and out of HDX 1000. The BitTorrent downloading service is also a plus. With this service, I can use my HDX-1000 (with internal HDD installed) to perform the download task and leave my PC to rest at night.

As to the web services, I have mixed feelings. The service can definitely do the job and it offers a good variety of channels to see. However, I just don’t like to use the limited buttons on the remote control unit to navigate. Imagine you are using your cell phone key pad to browse the Internet and do any necessary search key-in. This is exactly how it feels. In addition, there is also one thing you need to know when using the HDX 1000 to perform web browsing: on a PC, you will receive a buffering message warning when the PC is retrieving data from Internet; on the HDX 1000, you will just experience a pause during data retrieving. Please go watch the following video clip. You can better understand the scenario. This is not a bad thing, but is something that may take getting used to. Usually, this pause only happens when you first try to load the media.

Read the Part 6 of the HDX 1000 Review - Comparison List

Go to the HDX 1000 Product Page at AmperorDirect.com

Monday, October 20, 2008

HDX 1000 Review #4 - Storage Options

Introduction

This is the 4th part of our HDX 1000 review. We are going to go through all the storage options listed below:

  1. Store content in a remote PC (Covered in our HDX 1000 #2 Review – Basic functionality Test)
  2. Install an internal SATA HDD inside HDX 1000
  3. Connect a USB HDD / Flash Drive to HDX 1000 via the 2nd USB port (above the LAN port) at the back panel
  4. Connect a SD Memory via the Card Reader Port at the front panel

Internal SATA HDD

See our previous post of opening up the HDX 1000 box. You will need to do this to in order install the internal HDD.

HDX 1000 Opened Box

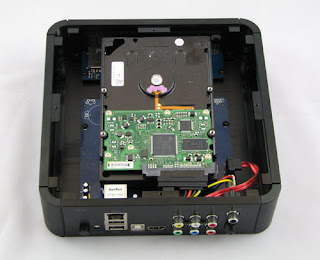
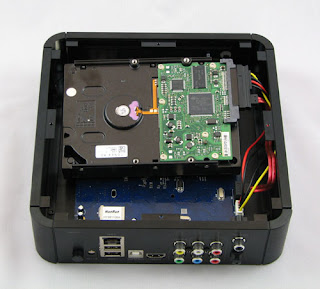
One thing we noticed is that the cover is in a true square shape. No matter how you turn the cover (90 / 180 / 270 degrees clockwise…), you can see the four screw hole positions matched on the cover and on the case – and you can still screw down the cover! This offers some flexibility when determining the installation location of the internal HDD. Based on the included SATA cable length, you can put the internal HDD in the following two directions.

HDX 1000 HDD Installation -1

HDD 1000 Installation -2

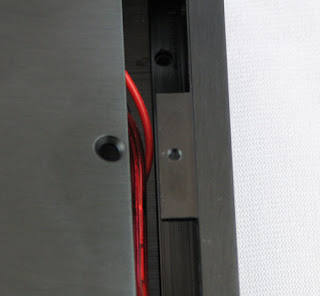
We found the latter one is more appropriate because we don’t want the SATA cable to sit right above the output video channel (just in case there is any interference…). You need to be careful not to snap the SATA cable (see the picture below) when putting the cover back or you will run the risk of damaging the SATA cable.

HDX 1000 HDD Installation -3

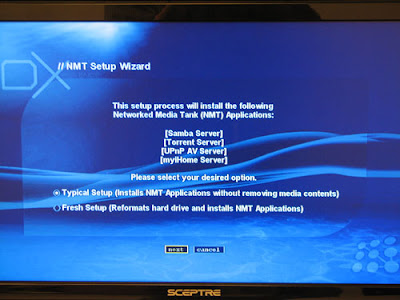
If this is the first time you have installed this HDD to the HDX 1000 machine, you will be prompted for the NMT application wizard. The functions of the NMT application will be explained in the next article. At this point, we’ll just go through the installation process.

  • Select if you want to do typical or fresh setup. The typical setup will keep the content file already in the HDD. The fresh setup will do a fresh format. Both options will install the NMT application.

HDX 1000 NMT Player Setup -1

  • I want to keep the contents in the HDD so I chose the typical setup. The system will display a warning message. Just click “next” if this is the right option.

HDX 1000 NMT Player Setup -2

  • Select where the NMT application setup file is located. I can never successfully initiate the process by connecting to the online server. Therefore, I pick the USB option. (You need to download the NMT application setup file from HERE to your USB Drive root path. Be sure to have the related firmware updated and rename the downloaded file to “syb8634.nmt”. I wasted a lot of time by not having HDX 1000 locate the setup file because I didn’t rename the file!)

HDX 1000 NMT Player Setup -3

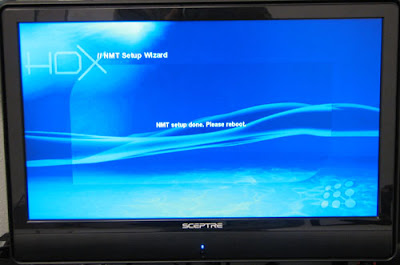
  • You will see the installation process begin. After it finishes the process, it will re-boot the system.

HDX 1000 NMT Player Setup -4

HDX 1000 NMT Player Setup -5

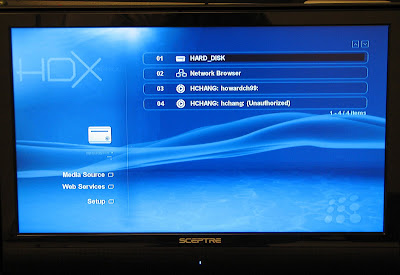
After your HDX 1000 is re-booted, you can see the “HARD_DISK” folder in the “Media Source” page. You can navigate to the content you want to playback in the HDD from here.

HDX 1000 Internal HDD Installed

External USB HDD / Flash Drvie or Memory Card

The HDX 1000 has two USB ports on the back panel. Only the bottom one (above the LAN port) works! HD Digital Technology has moved the internal circuitry of the top USB port to support the memory card reader on the front panel. The top USB port can only work as a USB power charging port. You can plug in your USB HDD or USB Flash Drive to the bottom USB port. Just like in the computer system, the USB devices can do plug-and-play on the HDX 1000. You will be able to see your USB device pop up in the “Media Source” page and locate your contents from here.

HDX 1000 with USB Drive and SD Memory Card Installed

You can also plug in a SD card to the card reader slot on the front panel. Among all the Syabas based NMT player, this is the feature only offered by HDX 1000. It comes in very handy if you want to display some pictures from your digital camera. The card reader slot also supports hot-swapping. You can plug in your memory while the system is running, without damaging the memory or your HDX 1000.

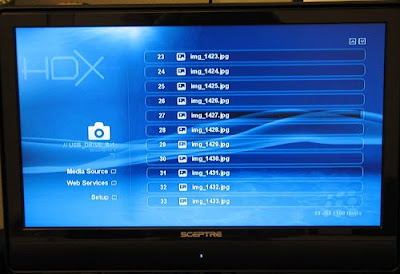
Please note that the SD memory card will be shown as a USB drive under the "Media Resource" page.

HDX 1000 SD Memory Card as USB Drive

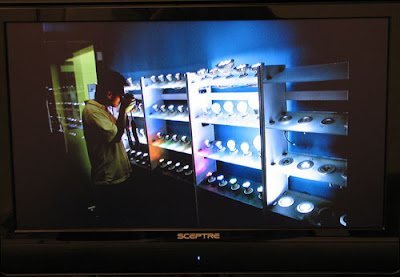
Here are two pictures displayed on TV using HDX 1000. The first one is taken when I went to source LED lights in Chinese. The second one is a tree fall-down in my community during hurricane Ike.

HDX 1000 photo displaying -1

HDX 1000 photo displaying -2

Some Suggestions for the Next Generation Media Player

  • Can the USB ports be moved to the front panel? It will be easier to access to the USB port while the HDX 1000 is placed in a home entertainment cabinet.
  • I really love the card reader design on the HDX 1000. It is in the front panel so there are no complaints about the port location. If the Syabas software can offer an interface to do small icon preview, it will make the picture browsing experience more friendly. Besides, if the “next” button on the remote controller can be designed to activate the next picture stored in the same folder, it will reduce a lot of button hitting efforts.


HDX 1000 Listing Photos by Names

Enjoy the review? Want me to cover some other things on the HDX 1000? Please give me some feedback. In the next article, I’m going to go over the services (web, ftp…) provided by the HDX 1000.

Read the Part 5 of the HDX 1000 Review - Services


Go to the HDX 1000 Product Page at AmperorDirect.com

Sunday, October 19, 2008

HDX 1000 Review #3 - Specification and Peek Inside the Box

Introduction:

This is the 3rd part of our HDX 1000 review. Two things are covered in the article:


1) A list of the HDX 1000 product specifications from HD Digital Technology.
2) Peek inside the magic black box.

HDX 1000 Product Specifications:

CASE

* Solid Aluminum Alloy Case
* SDHC, MS and MMC Card Reader
* Compatible with 3.5" and 2.5" SATA HDD
* Hardware Power ON/OFF Switch
* Supports Vertical or horizontal placement

CPU

* Sigma Designs SMP8635 Rev. C

Memory

* DDR DRAM : 64-bit 512Mb
* External NOR Flash : 16-bit 256Mbit
Audio/Video outputs (gold-plated connectors)

* HDMI v1.3a (up to 1080p)
* Component Video (up to 1080p)
* Composite Video
* Stereo Analog Audio
* S/PDIF Coaxial Digital Audio
* Optical Digital Audio
Hardware Connectivity

* 2x USB 2.0 host
* 1x USB 2.0 Slave
* Serial ATA (SATA)
* Ethernet 10/100

What’s inside the HDX 1000 Box:

Who can resist the desire to peek inside the black box? I cannot. But the good news is I’m going to open my HDX 1000 so that you don’t need to open yours.

The cover is actually designed to be on the bottom of the HDX 1000. After turning HDX-1000 up-side-down, you can see the four screws which hold the cover.

HDX 1000 Bottom View

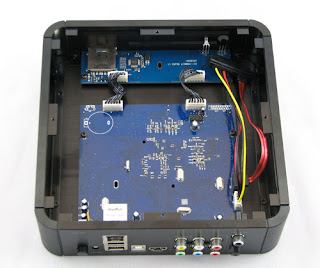
There are two PCBs in the box. The small one is to handle the card reader function in the HDX front panel and the infrared communication between HDX 1000 and the remote controller. The big one is the main PCB which processes all the other functions. The PCB component side is facing down so that you cannot see the chips. One thing to note is that a SATA cable is attached to the main PCB. You don’t need to buy another cable if you want to install a SATA HDD inside the HDX 1000.

HDX 1000 Opened

This picture is what it looks like after removing the main PCB. You can see the white heat-transferring glue left on the case. That is the relative position where the main controller chip, Sigma 8635, locates on the PCB. HD Digital Technology claims their aluminum case and the heat dissipating architecture is so efficient that they can eliminate the fan inside the box. Without the fan turning wild in the box, HDX 1000 can operate very quiet in your living room.

HDX 1000 Main PCB Removed

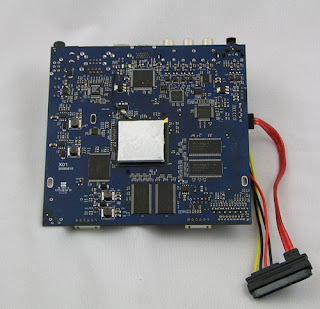
This is the component side of the main PCB. The big chip with white heat-transferring glue on it is the Sigma 8635. It is the powerful engine of the HDX 1000.

HDX 1000 Main PCB

A jumper wire? I must have got a sample unit.

HDX 1000 Jumper Wire

OK, this is how the inside looks like for HDX 1000. My next step is to put everything back. As you might already know, putting things back is usually more challenge than taking things apart.

HDX 1000 Loading

Woola… My HDX 1000 is put back together and is still alive. People in HD Digital Technology: I guess I am qualified for your tech-1 support job in US. Want to hire me?

Next time, we are going to go through all the storage options.

Read the Part #4 of the HDX 1000 Review - Storage Options

Go to the HDX 1000 Product Page at AmperorDirect.com
Friday, October 17, 2008

HDX 1000 Review #2 - Basic Functionality Test

Introduction

HDX 1000 Front ViewThis is the 2nd part of our HDX 1000 review. In this article, we are going to run through a high-level functionality test which covers installation, start up sequence, GUI and playback functions. We will put our suggestions and tips of operation in the article, as well. This can also be used as a user quick-start manual.

Testing Goal

A high-level functionality test will be performed to see if HDX-1000 can accomplish the core benefit of a digital media streamer: playback a digital media file stored in a remote content library. (In the test, a HD content will be used because HDX1000 is designed to be capable of decoding the H.264 HD file format).

Installation

HDX 1000 Back ViewInstalling HDX 1000 is a breeze. Just follow the below steps, and you can have the box ready to go in 10 minutes.

1. Connect AC power adapter, network cable and A/V cables to the back panel of HDX 1000.

2. Put batteries into the remote control unit.

3. Turn on the power switch.

4. Grab your remote control unit. Sit back on your couch. You are ready to rock.

One thing to be noted is that HDX 1000 is designed by the HDMI v1.3 standard. Be sure to grab a v1.3 cable if you want to use HDMI interface to connect HDX 1000 to your home entertainment system. It will help you maximize the full potential of your HDX 1000.

HDX 1000 Start Up Sequence

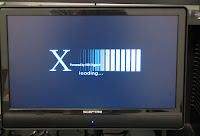
HDX 1000 Loading MessageRight after the power button on the back of HDX 1000 is pushed, you can see a “X power by HD Digitech” message on the screen. The message can stay on the screen for around 60 seconds. Then, you will see the screen switching between “black screen” and “no signal” mode for about 30 seconds. Because the “black screen” mode output is black and the “no signal” mode output is bright blue, it is kind of annoying to watch the screen flickering back and forth between dark and bright colors. Here is my first suggestion to HD Digital Technology: it might be better to disable the output or keep it in a dark black color during this 30 second period. There is a big chance that an inpatient user like me will hit the reset button during this confusing period and not allow the box to fully start-up.

Anyway, there are many components in the HDX 1000 box to be woken up during the turn-on sequence. The whole process will last for around 90 seconds. Don’t go into panic mode if you wait longer than you expected.

Welcome screen / GUI Root Menu

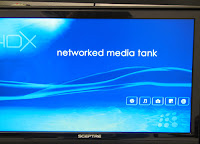
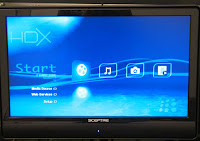
HDX 1000 Welcome ScreenAfter successfully booting up HDX1000, users can see the welcome screen and the GUI root menu appear on the screen. On the left-hand side, there are three main function categories: media source, web services and setup. This article will be focused on the “media source” function. (The latter two functions will be covered in upcoming reviews.) Comparing to the GUIs from other digital media streamers, this interface (from Syabas NMT player solution) is actually the most clean and simple one we have ever seen. Hence, it can generate the most straight-forward menu navigation experience.

Discover and Browse Digital Content Library

HDX 1000 GUI Root MenuWhen using HDX 1000, there are several places where people can store their content library. It can be in a PC residing in the same network, in an external storage device (such as USB HDD, USB Flash Drive or SD Memory), or in a HDD installed inside the HDX 1000. I will focus on the first method and leave the introduction of the latter two in another article so that I won’t create a 10-page monster to bore you.

OK, while leaving the HDX 1000 on, please move back to your PC. There are works to do to make your HDX 1000 and PC talk to each other.

1. Go download and install the Window Media Player if you don’t already have one running on your computer. The link to download the page is at Here.

2. Bring up the Windows Media Player 11 (WMP11).

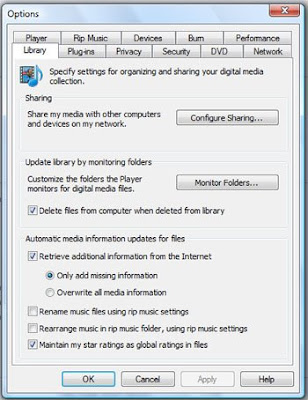
3. Click on the Library button on the WMP11 tool-bar. Then, click on “More Options”.

4. Click on the “Configure Sharing” button in the Library tab.

HDX 1000 WMP11 Library Setting

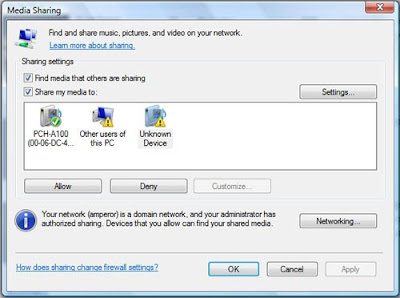
5. In the new pop-up Media Sharing window, activate the “Share my media to” option in the sharing settings section.

HDX 1000 WMP11 Media Sharing

6. You should be able to see the PCH-A100 (XX-XX… Mac address of your HDX 1000) icon in the available-neighbors window. Click on the icon and then click on the “Allow” button below the available-neighbors window.

7. Click on the “OK” button to close the Media Sharing window.

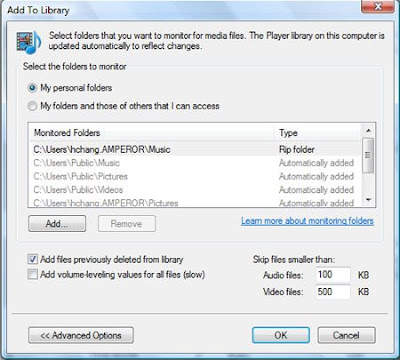
8. Click on the “Monitor Folders” button in the Library tab and add-in the folders you store your contents into the monitoring list.

HDX1000 WMP11 Monitor Folders

HDX 1000 Media Source Screen9. Click on "OK" to finish the setting.

Go back to your HDX 1000. Use the arrow keys on the remote control unit to click on the “Media Source” on the left-hand side of the screen. You should be able to see your computer’s label appear on the media source menu. Click on your computer’s label, select the media file type from the four icons (video / Audio / Picture / Document), and you can start to browse your content library.

One thing to be noted is that you won’t be able to see all the files after selecting the media type icon. In other words, after you click on the video icon, you won’t be able to see any audio type files in the folder. This actually confused me the first time I used Syabas based machine. HDX 1000 Media Type SelectionHowever, after getting used to the settings, I found no problem in locating the file I wanted to play.

(There are other ways to connect HDX 1000 to PC, too. I'll list them later if I have time.)

Playback Functions

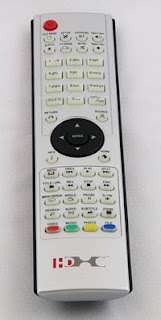
After successfully locating the file you want to play, the rest of the operations are intuitional. The “play”, “stop”, “pause”, “fast-forward” and other playback function buttons are all included on the remote control unit. They are also clearly marked so that there is not a big chance you will miss them. In the following, there are several observations I have which might help to improve your remote control smashing experience.

HDX 1000 Remote Controller1. “Return” and “Stop” buttons do two different things. When you are in the file browsing mode, the “return” button can bring you back to the previous page. When you are in media playing mode, the “stop” button can stop the playback function. There is no such short-cut as hitting “return” button to stop the media playing and bring you back to the previous browsing page. You need to press “stop” and then “return”.


2. The “fast-forward” and “reverse” playback function can still use some improvement. The display starts to skip frames when the “reverse” function is activated. In addition, depending on the file type, the transition between “fast-forward” and “play” function can sometimes be not smooth.


3. A good feature of digital movies is that every small piece of the movie is indexed by a time frame. While playing the movie, the “left” and “right” arrow on the remote control unit can help you navigate the movie to the time frame you want play, in a very fast way. Now, if you are an action movie fan like me, you can memorize the time index where John McClane takes down the F-35 in Live Free or Die Hard and easily jump to the spot as many time as you want.

Conclusion

We achieved our testing goal with the HDX 1000, which was to playback an HD digital media file stored in a remote content library. It is always good to watch the HD content on a big screen TV. In the next review, we are going to go over the specifications and lift the HDX 1000 cover to see what’s really inside this magic black box.

Read Part 3 of the HDX 1000 Review - Open the Black Box


Go to the HDX 1000 Product Page at AmperorDirect.com
Wednesday, October 15, 2008

HDX1000 Review #1 - Package List and Picture Set

Introduction

This is the 1st part of our HDX-1000 review series. Two things will be covered in the article:
  1. The reason why we chose the HDX1000 as our first focused product in the Digital Media Streamer category.
  2. A picture gallery of the HDX 1000 and the accessories included in the retail package.

Why We Chose the HDX 1000

As we discussed in the previous post, there are several digital media streamer solutions on the market. Although they are referred to by different names, their major function is the same: they can playback the digital contents stored in your digital library. After comparing the available products, we believe the one that uses Sigma 8635 chipset and the Syabas NMT software as the solution provides the most value. It offers H.264 high definition playback capability and has an acceptable user interface.

There are three major players using the above mentioned solution: Popcornhour A-110 from Syabas, iStarHD Mini 1.3 from ISTARHD, and HDX1000 from HD Digital Technology. We have contacted all three of them to express our interest in becoming their exclusive US dealer. (After experiencing the nightmare of waiting for months for a Popcornhour A-100, we want to stock enough inventory in our Houston warehouse and use AmperorDirect.com’s established e-commerce website to make the experience of owning a digital media streamer in the US much easier). The responses from the three vendors were totally different. For Syabas, they don’t care about setting up a US reseller. Their main purpose for the Popcornhour A-100 / A-110 is to promote their Syabas NMT Player solution. As to working with iStarHD, it has been a unique experience. Although we have already established the channel to purchase and re-sell iStarHD Mini 1.3, we still cannot get a physical phone number from them. Every time we send an email to them, we pray that the email will not be overlooked.

Our experience in talking to HD Digital Technology has turned out to be the best among the three vendors. Their Sales V.P. is very friendly and can be easily found on Skype. Their Tech Support guy works almost on US hours. Additionally, their Engineering V.P. is extremely knowledgeable (and very talkative in a good way…:)) about the digital media streamer market. He is even willing to sacrifice his bed-time to help a novice user like me across the pond to get familiar with the machine. Besides, he and my grandfather are from the same town south of Beijing. To a Chinese guy, “Lao Shiang” (pronounced as “Low Shawn”, and represents a group of people coming from the same hometown) means a lot. That’s why we chose HD Digital Technology’s HDX 1000 as our first main focus.

(OK, ok… this is why my boss cannot let me put this article on our website. I need to be more serious.) During the past several months working with HD Digital Technology, we feel that this company consists of good people and can provide a good product. “Good Products” and “Good Service” happen to be the two core values AmperorDirect.com wants to offer to our customers, as well. We are pleased to find a company that shares the same values as us. This is the real reason why we chose HD Digital Technology’s HDX 1000 as our first main focus.
The Package Includes:
  1. HDX 1000
  2. Remote Control Unit
  3. Battery for the Remote Control Unit
  4. One HDMI 1.3 Cable
  5. One USB Cable
  6. One Universal AC Power Adapter w US Power Cord
  7. Four Rubber feet for the HDX 1000
  8. Six Screws (for mounting HDD)
Here are some Pictures about the HDX 1000:
  • Retail Box:
Just pretend you are listening to Back in Black from AC/DC
...
Cause I am back on the track,
And I'm beating the flack,
Nobody's gonna get me on another rap,
...

HDX1000 Retail Box

  • HDX 1000 Front View:

HDX 1000 Front View

  • Card Reader on HDX 1000

HDX1000 Card Reader
  • HDX 1000 Back Connection Panel:

HDX-1000 Back View
  • HDX 1000 Ports -1:

HDX1000 Ports -1
  • HDX 1000 Ports -2:

HDX1000 Ports -2
  • HDX 1000 Bottom View:

HDX1000 Bottom View
  • HDX 1000 Accessory Set: (A little complain: the screws can be put in a small plastic bag...)

HDX1000 Accessory Set

Stay tuned. We'll have more reviews on HDX1000 to come.

Read Rart 2 of the Review - Basic Functionality Test

Go to the HDX 1000 Product Page at AmperorDirect.com